Here is a comprehensive guide on how to clean headphones and prevent dirt build-up on your equipment. Headphones are costly for anyone who values quality sound, and it is a shame to lose a perfect set of headphones due to poor maintenance. This post provides a comprehensive guideline for cleaning and maintaining your headphones efficiently.
Quality sound is a sought-after experience for movie, music, or game lovers alike. Purchasing high-quality headphones is often the first step to getting premium sound inside your ear canals. However, high-quality headphones usually have an expensive price tag, and maintaining them becomes a primary task on your to-do list. Maintaining the headphones involves regular cleaning, and the post below illustrates how to clean headphones.
Table Of Contents
Benefits of Regularly Cleaning Headphones
Regular cleaning of your headphone set has several benefits, and below are reasons why you should clean your audio headsets.
Improved Sound Quality: Frequent use of headphones leads to the accumulation of dirt, oils, and debris on the earpieces, thus leading to sound impediment. The sound encumbrance later prevents you from receiving the optimal listening experience from your headphones.
Hygiene and Health: The earpieces on headphones come into contact with your ears and are prone to accumulating bacteria, sweat, and earwax. Regular cleaning habits help remove these contaminants and promote better hygiene by reducing the risk of ear infections or skin irritation.
Extended Lifespan: A regular cleaning routine of headphones helps remove dirt and debris that could damage internal components like drivers. The preventive measures for maintaining such essential parts prolong the lifespan of headphones.
Aesthetics and Presentation: No one likes dirt accessories, and regular cleaning of your headphones keeps them looking fresh and well-maintained. Cleaning your headphones is also essential if you use them in professional or public settings because it helps portray a positive image.
Better Performance for Noise-Canceling Headphones: Premium quality noise-canceling headphones utilize precise microphones and sensors to detect and cancel external sounds, and regular cleaning improves the noise-cancellation feature.
Prevent Odors: Dirt, debris, and bodily excretes can lead to odor build-up, and regular cleaning helps keep your headphones smelling fresh.
Personal Connection: Regular cleaning of your headphones is like cleaning your car, thus leading you to develop a deeper connection with your accessory and have peace of mind whenever you are around it.
Understanding Headphone Components
Understanding the different components of headphones is essential when disassembling and assembling headphones. Most headphones feature four general parts that you must familiarize yourself with before embarking on the cleaning process. The four parts of headphones include the following.
Ear pads/cushions
Headband
Earpieces/driver units
Cables/connectors
The content below covers how to dismantle the above parts, clean them, and reassemble the headphones afterward.
Preparing for Cleaning
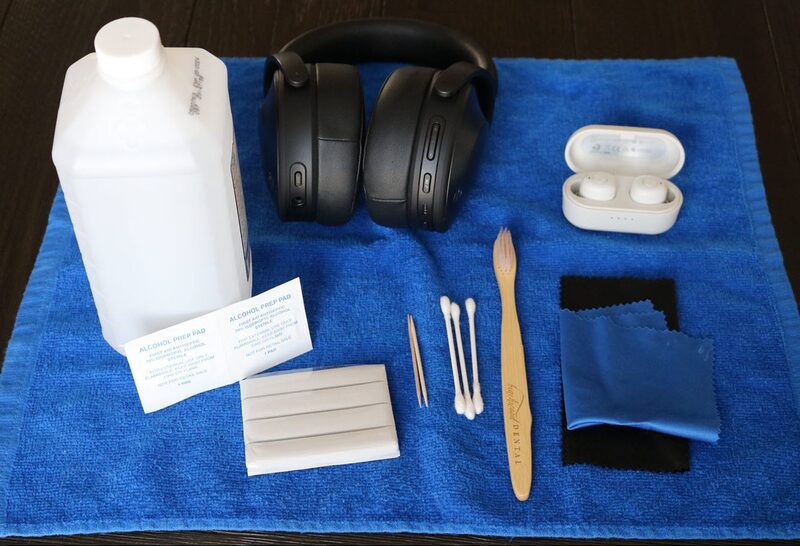
One of the prerequisite steps for cleaning headphones involves the gathering of necessary cleaning supplies. Gather the following cleaning supplies before dismantling your headphones.
Soft cotton cloth
Bowl
Microfiber cloth/lint roller
Isopropyl alcohol/hydrogen peroxide
Distilled water
Cotton swabs
Toothbrush
Soft detergent
You are ready to start cleaning once you gather the prerequisite supplies. However, look for the manufacturer's recommendations for cleaning your headphones on the packaging or casing.
Step 1: Disassemble the Headphones
The first step to disassembling the headphones is removing the jack cable if your headset has one. The next step is to remove the ear pads/cushion covering the driver units. However, note the right/left ear pad cushion because measurements for both may vary depending on the headphone model.
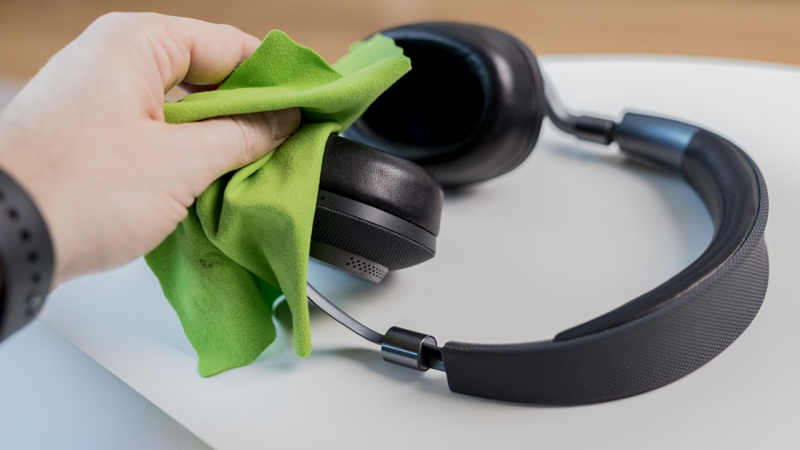
Step 2: Cleaning External Surfaces
The external surfaces include the metallic or plastic on the outside of the headphones. Follow the prompts below to clean the outer surface of the headphones.
You can clean such surfaces by taking a bowl of water and mixing it with a detergent.
Dip a soft cloth in the mixture and rinse excess water before cleaning the metallic and plastic surfaces on the outer side of the headphones. Apply gentle pressure while removing tough stains, smudges, or debris to prevent damage to the surface.
Dry the surface with a dry and soft cloth to prevent scratching the outer area.
Step 3: Clean Headphone Pads
The method for cleaning the ear pads/cushion may vary depending on the material on your headphones. The material for the ear pad can be genuine leather, velour, fabric, or faux leather. The processes for cleaning genuine leather and faux leather are similar. On the other hand, you can use the same technique to clean velour or fabric ear pad cushions. Follow the steps below to clean the leather dressing material on your headphones.
Start by taking a bowl and adding warm water before mixing with a soft detergent. You can add isopropyl alcohol/hydrogen peroxide to the mixture if you warm it to disinfect the cushion and prevent ear infections.
Take a cotton swab and dip it into the mixture before testing it out a small part of the cushion. Testing the cleaning solution with the cotton swab helps check if it is too strong to decolorize the ear pads. Dilute the cleaning solution or make a new mixture without the isopropyl alcohol/hydrogen peroxide if the color of the ear pads rubs off on the cotton swab.
You can dip a soft cotton cloth into the solution before rinsing off excess water.
The next step is using the dump cloth to clean the ear pads. However, ensure you use gentle pressure while rubbing to prevent discoloration.
Cleaning velour or fabric ear pads requires a microfiber cloth/lint roller to remove dirt/debris.
You can then dip the ear pads in the cleaning solution before rinsing them off with clean water and leaving them to dry in a cool/dry place.
Avoid drying all the above materials in the sun to prevent damage like cracking or discoloration on the ear pads.
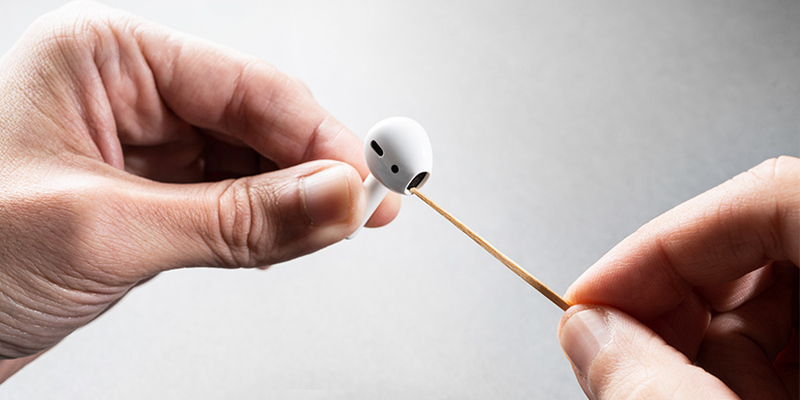
Step 4: Cleaning Headphone Drivers
Follow the steps below to clean the headphone drivers on your device.
Start by taking a soft toothbrush and brushing off any dirt on the headphone's drivers. However, cover the holes showing off the speaker membrane or brush while facing the drivers downwards to prevent loose dirt/debris from entering the driver’s membrane. You can also brush off the dirt using outwards motion.
The next step is using a soft cotton cloth to dip in the cleaning solution before rinsing it and cleaning the drivers. You can use a cotton swab to clean the hard-to-reach areas.
Use a dry cotton cloth to dry the headphone’s drivers after cleaning.
Step 5: Cleaning the Headband
You can use the cleaning procedure in “Step 3” above to clean the headband of your headphones. The ideal cleaning process will depend on the type of material on the headband of your headphones.
Step 6: Cleaning the Cables
You can dip a soft cloth in the cleaning solution before cleaning the jack cables for your headphones. A paper clip can also remove dirt inside the female jack plug of your headphones or playback device.
Step 7: Assembling the Headphones
The last step is reassembling the headphone parts back to their original position. Ensure the headset parts are clean and dry before reassembling the headphones to prevent rust or moisture damage.
Conclusion
You can use a headphone case to prevent dirt from accumulating on your device whenever you are not using it. However, you also clean the headphone case regularly to keep your audio accessory in tip-top shape. Using Silica gel when storing your headphones in a case also helps suck residue moisture from your headphones and prevent damage to your unit.
Quick answer: Most Amazon headphone orders still follow Amazon's standard return framework in 2026: if the order is eligible and the item is in origina...
Do you want to elevate your audio experience with superior sound quality, stylish design headphones, and seamless performance? Here comes the Urbanears Hea...
Noise cancelling headphones come with many perks, from turning a chaotic background into tranquility to transforming your listening experience into a seren...
Want to keep your headphone battery performing at its best? Find out why your headphone battery keeps running out very fast in this guide. Discover the essen...
Headphones have become an essential part of our daily lives, whether jamming to our favorite tunes, immersing ourselves in a podcast, or simply seeking qui...
Wondering what ambient noise headphones are? Find out what ambient sound headphones are in this guide. Learn more about these headphones that let you hear ...