[Fixed] What Does Check Signal Cable On Monitor Mean?
Check Signal cable prompt may appear if the cable is damaged, the insertion port is damaged, CPU issues, graphics card issues, the PC is in hibernation mode,...
Cable Management – anyone who has had to maintain cables in a closet can tell you stories about searching for the right cable, or unplugging the wrong one. Bad cabling jobs are the stuff of IT humor, unless you are the one who has to fix it. And good cable management jobs are few and far between. And as someone who has always said that if racks look good, they usually work good (I know – bad english, but you get the point), I’m particularly happy when I find something that helps keep cables neat and organized. The Neat Patch NP2 is just such a product.
Table Of Contents
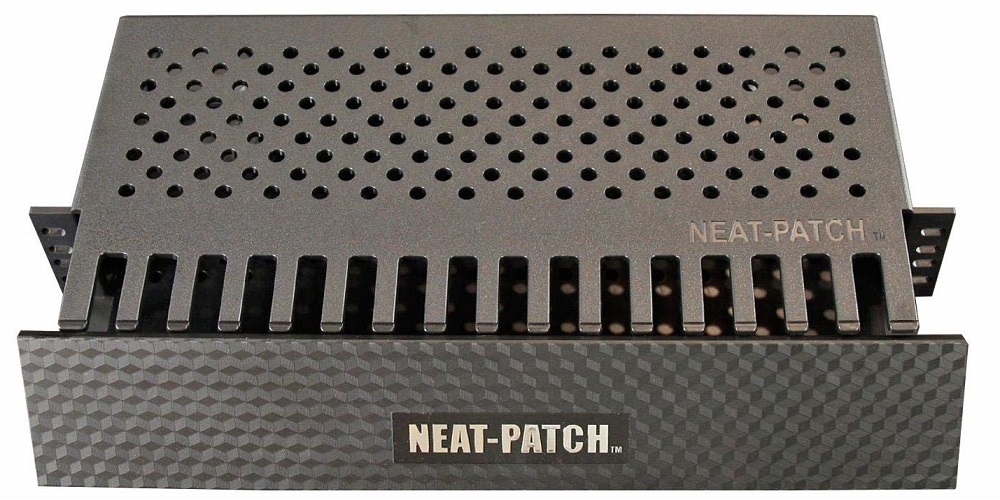
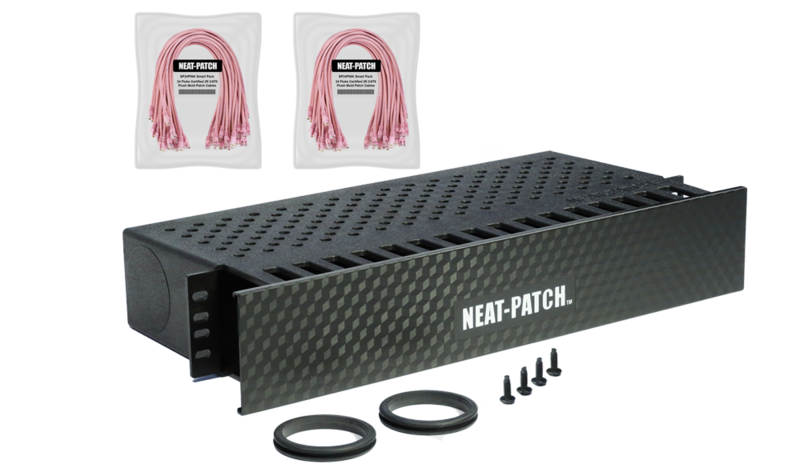
The Neat Patch NP2K6 Kit is a complete cable management solution for a 24 port switch / patch panel. It comes in the standard brown box that all installable hardware seems to ship in, but that’s where the similarities end. The kit consists of one NP2 cable management horizontal tray, a snap on cover for the front of the tray, twenty-four 2 foot cables (more on those later), and mounting hardware screws for the tray.
What immediately struck us on opening the box was the method of packing the 24 cables. They aren’t individual wrapped, but are in a single bag. Having spent hours opening patch cable bags, this endeared us to the kit right away. As an aside, the cables are currently available in six colors: blue, yellow, orange, grey, white and green, with black and red coming soon.
We’re going to need to break this section up a bit. Before we get to the physical installation of the unit (which is very easy), we need to have a short discussion about the theory behind the NP2. This really isn’t just a device, but a system for good cable management. The installation guide spells it out in greater depth, but the basis of the design is that most rack cabling jobs use cables that are too long. Because of the length of most patch cables used on racks, there is always a ton of extra cable smashed into cable management trays or controllers. The other problem with rack cabling jobs is that they depend on vertical cabling in trays, as well as horizontal. Anyone who has a full rack of switches can tell you that you end up with tons of untraceable cable in the vertical channel. The NP2 is designed specifically to alleviate those issues.
The theory behind the NP2 is not really a product theory, but a cabling theory. Neat Patch has very specific designs for laying out racks. The NP2 tray is but one part of the solution. The 2 foot cable, and the overall design of your racks is what makes the system work. The installation manual has a few design examples of how to layout your patch panels and switches to make the system work at it’s best. If done correctly, the only thing in the vertical channel are cable runs to end stations, and cross connects between switches.
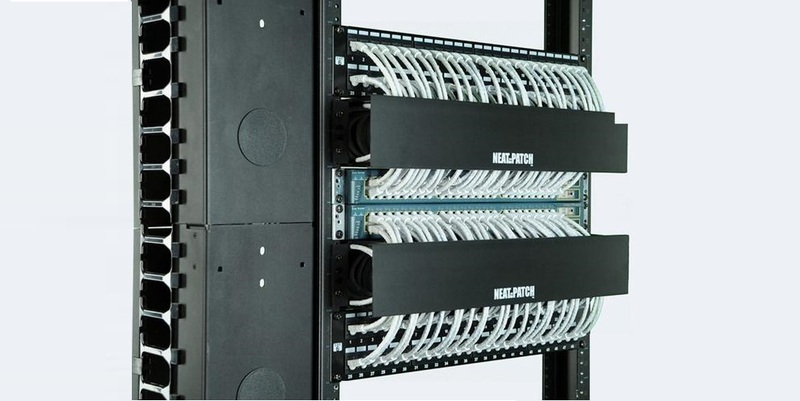
The first thing you need to do when installing this system is layout your racks. This includes where the patch panel with the floor runs goes, how many panels you have, how many switches, etc. A basic design, and the core design for Neat Patch is to layout your rack in this order, top to bottom:
24 port patch panel – 1 RU
Neat Patch NP2 – 2 RU
48 port switch – 1 RU
Neat Patch NP2 – 2 RU
48 port patch panel – 2 RU
Neat Patch NP2 – 2 RU
48 port switch – 1 RU
Neat patch NP2 – 2 RU
24 port patch panel – 1 RU
That gives you 96 switched drops in 14 RU, which isn’t bad. I’m assuming that you are using fiber to connect the switches, if not you lose a couple of ports to the floor. As you can see, you can continue this to fill the rack. The only real change is that you need a 24 port patch panel at the top and bottom of the stack. Here is a picture of a rack wired this way.
The unique thing is that the neat cable job you see will stay that way forever. The 2 foot patch cables are installed between ports on the patch panel and switches and looped once in the Neat Patch NP2. This gives the cable a compliant bend and avoids sharp corners and strain. The cables are installed from left to right, and should be done with patch panel ports matching switch ports. In other words, panel port 1 always connects to switch port 1, panel port 2 always connects to switch port 2, etc. This keeps the system neat and traceable, and makes sure that you maintain compliance.